Search One Striped Sock

Friday, January 14, 2011

Sweet, Silly, Serious

This fall I was asked to be part of a craft fair to raise money for the amazing nonprofit and reuse center, Materials For The Arts (http://www.mfta.org/) In the spirit of reuse, I stuck to materials I already had around my apartment including a shoebox full of little cards that had been sitting on my bookshelf for a year and a half. In my last year of school, as I was cleaning out my flat file in the printmaking department, I came face to face with all the prints that I had abandoned. Unwilling to throw away the paper itself I spent a few afternoons tearing these unfinished prints into 4x4 cards.

One of my favorite ways to ways to make cards is to harvest an image or two from one of my Goldenbook Illustrated dictionaries. From the moment I spotted La-Po at my local secondhand store in high school, I knew we belonged together. It was love at first sight. Over the past five or so years I've accumulated a fair number of them and the spark has not faded. Published in the 50's and 60's, these books are full of tiny, bright colored, graphic and sometimes charmingly outdated illustrations. They are an endless resource. Let's just say, I'd consider them for the short list of things I might grab if my house was burning down.


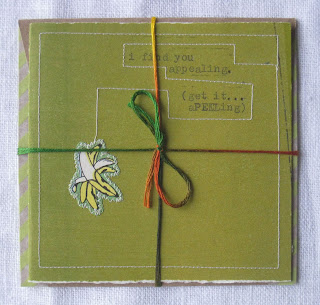
With my plain cards ready and my Illustrated dictionaries close at hand, a whirlwind of cutting, gluing, sewing, watercoloring and typewritering passed through my little apartment and a batch of 35 unique cards were born. Sweet, silly, serious - here's a sampling as they were packaged for the craft fair:


Of course, in all my wisdom, I neglected to consider the lack of 4"x4" envelopes, so I ended up making those too. I wouldn't rescue my collection of brown paper bags in a fire, but I would mourn the loss.


I DID NOT MAKE THIS (but i wish that i had)

This guy was selling his wares at the weekly craft fair/farmers market in Missoula, Montana this summer when we passed through. I drooled over his handmade canvas and leather rucksacks, returning to his booth several times to try them on, examine them...be near to them.

You can find his things at http://leatherandcanvas.com/html/ruck_sack.html

They are stunning and beautifully crafted. And if you are wondering what to get me for my birthday....


Monday, September 20, 2010

Dirty Laundry...Literally

I have returned from my One Striped Sock hiadus! I have many things to tell you about but first I will say this: bike travel is a wonderful thing. Everyone should try it out. I spent the better part of the summer pedaling my way across these United States with two friends and boy was it worth the trouble. Check out our trip blog at http://wearebikingreallyfar.wordpress.com/ and then start planning your bike tour!

So...after seven weeks of living on a bike seat by day and in a tent by night, I returned home with a hyperactive nesting instinct, a burning desire to reorganize and an inexplicable urge to make all my own food from scratch. I baked a nice fresh loaf of bread, whipped up a batch of granola, made some yogurt, deep-cleaned my apartment and started getting rid of extraneous odds and ends. Among them, copious amounts of cardboard boxes, which, like egg cartons, had seemed too full of potential to give up. I also decided that I needed, once and for all, to buy a hamper to corral my dirty clothes which usually remain strewn about the floor in the back room until I gather them up for laundry day. This is not how adults live! After a trip to a few home stores, I discovered that the woven hamper I was looking for was much too expensive. AHA(moment)!: Cardboard, hamper...Hamper, cardboard...a cardboard hamper!

I began cutting my flattened boxes with an exacto and ruler into weavable strips. In order to make them long enough, I enlisted the help of my new favorite material: brown paper tape (many thanks to Zachariah Durr, cardboard builder extraordinaire, for cluing me into the stuff). You wet the adhesive side with a damp sponge and voila! It is a super strong bond that blends right into that lovely cardboard brown. Well, I personally think it's lovely. The half circle you see is the piece I cut out for the bottom so that the hamper would sit right up against the wall.


Next, I glued an even number of strips *important for weaving* to the base in a radial fashion so that they could be bent upright and form the vertical slats of the weave (please forgive the dizzying angle of this photo).


Once all the side strips were in place, I bent them upward, secured a horizontal strip to one of the back slats and began weaving around and around. The first few rows were the most difficult because all the strips were unruly and flopping around willy-nilly, but as the basket took shape the weaving became much easier.


I continued adding strips to the weaving with paper tape until the basket was just about waste-height. I trimmed the extra length of the vertical strips and finished of the top edge of the basket with a layer of paper tape to give it a nice clean look.


Last but not least, I sewed a simple bag out of an old tablecloth to line the hamper. When it's full, I pull the whole bag out, throw it over my shoulder and joyfully make my way down to the laundry room!


Monday, May 17, 2010

a fiber-filled reintroduction to drawing


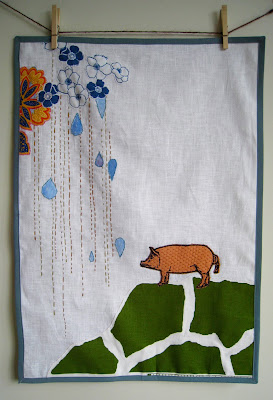
These dishtowels do not win the prize for the most belated birthday gift I've ever given, but they certainly make the short list. What was supposed to be a pretty little present for my sister (and kind-spirited spoof on turning thirty), morphed into a series of dishtowel-sized, mixed-media tapestries. This process, which felt very similar to the way I used to approach my works on paper as a printmaker in college, must have satisfied some particular need in me. I love to make puppets and purses, but it felt good to draw again...even if I was drawing with thread.

So, a whopping three and a half months after she blew out the candles, I surprised my sister with dishtowels much too pretty to use.


Each of these "towels" is made with some combination of screen print, embroidery, acrylic paint and appliqued fabric.


Thursday, May 13, 2010

once upon a time...


...the world was just teeming with charming little objects.


cozy toes

Never mind all those fancy expensive cycling shoe covers. It's nice to have toasty toes in the rain, but not nice to pay $50. The water-proof material and velcro I used (of which I had plenty left over) cost me less than $15, and I had the elastic laying around. Money savings aside, it was worth the trouble just to have some shoe covers that are pink (!) and purple (!) instead of black. Who says rainy day biking can't be a stylish endeavor?


The bottoms cinch with elastic but are left open to accommodate the clip on the bottom of the shoe.


I made the pattern by draping fabric around my shoe, marking and cutting. The opening is in the back and there is a channel sewn around the outside edge where the elastic can be shimmied in using the old safety pin trick!


Fits like a...shoe glove.


An extra piece of velcro at the top to adjust the ankle and prevent water from dripping in (and to add an extra splash of pink!).

one man's trash...


(found outside the recycling center on E. 4th)